Once we bought the raw land, of course, we drove straight to the property from the title office. We start driving the SUV we’re in through the shallow ditch, and much to our surprise, that small ditch was too much for the SUV. We heard a crunch. It didn’t take us long to realize that we need a culvert to access the property. That led us down the path to find out how much a culvert for a driveway was.
For counties that install but do not supply culverts, your cost is $200 for a 12″ diameter culvert 20 feet long. The 24″ diameter culvert is around $500 for the same length. If you pay for installation, it will be another $1,000 – $3,000 depending on how much additional dirt and materials you need.
However, through this process, we discovered that the price to have a culvert installed varies widely depending on your county’s requirements.
The first time we had a culvert installed, we supplied the culvert and the county installed it.
The next time on the recently purchased property, we had some sticker shock because the county required us to have it installed with a local installer through their permit process. It was nearly 3 times as much!

Know Your Local Requirements
Before you do anything, it is important to know what is required for your local city, county, and neighborhood HOA (if you have one).
We are in the Houston, Texas area, so we looked into the regulations for each of the counties within a 2-hour range. That’s a big bubble, and we found a wide variation between the counties.
Some do not allow metal culverts while some do.
Some counties will do the installs through their road and bridge departments with you paying for the actual culvert.
Some actually require you to find and have it installed fully at your expense but with a free permit. There were even some counties that had no limits on the number of culverts they will install, but some stopped after your second.
The differences between counties was very wide, so you will want to start with a chat with your county to find out what they require. You may get lucky, and you live in a county where the road and bridge department will do the install which means it is simply included in your annual tax burden.
If you have to coordinate the install, they may even have a list of installers to find your own, so just getting the conversation started with the local authorities has always proven helpful to us! Even the type of pipe required can vary, so seriously – pick up the phone!
Call a Professional for the Install
To install a culvert, we highly recommend you work with a professional for the installation.
The culvert essentially builds you a personal bridge to cross a waterway.
When you call a culvert a bridge, I think it adds some importance to the impact your install may have to water flow. This drainage is important to prevent flooding for you and your neighbors.
In addition, if the culvert is not laid at the right angle (aka grade), then you run the risk of the culvert washing out or causing a build-up of debris within it.
Think disaster unless you have related construction experience.
A professional installer will have the expertise to size and install according to the dynamics of the water flow across your property, and have a line of sight into any building codes your area requires.
Now that the disclaimer is out there, let’s dive into the types of culverts that are out there.
Types of Culverts
This guide on culverts will help you when you are looking for actual estimates for your specific driveway culvert install. Also, it will help you ask the right questions and help have a conversation with contractors to find the right one.
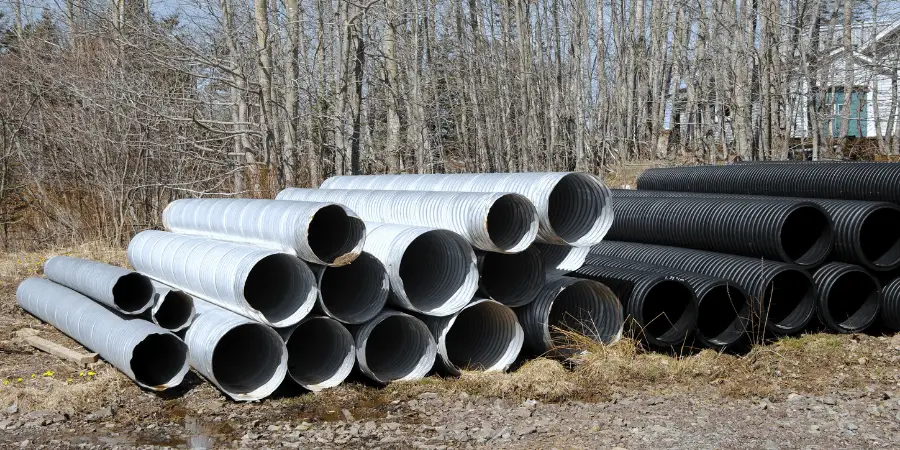
Corrugated vs Smooth Walled
Regardless of the material of the culvert, be aware that corrugated has a higher strength to weight ratio than a smooth one. This becomes important when you consider the weight of everything you plan to drive across it over the years.
However, when looking at culvert types, you will find both single and double-wall options.
The double-wall is another layer on the inside that makes the surface smooth. There are thoughts that debris will get hung up in the corrugated grooves, so the extra smooth layer will prevent this and keep water flowing optimally.
Load Capacity Rating
When you start looking at culverts you will see a load capacity value provided. For the most part, I see HP25, but HP20 pipes are also available.. If you are curious about what the values mean, an H20 can handle loads up to 32,000 pounds. H25 culverts give you an extra 5% at 40,000 pounds.
Culvert Pipe Material Choice
You have 3 choices in the material used for the culvert pipe (assuming your county allows all 3).
- Plastic: made of high-density polyethylene (HDPE)
- Metal: made of corrugated galvanized steel; may deteriorate faster
- Concrete: required along state-maintained roads and heavier traffic applications

Culvert Pipe Standard Sizes
Your local ordinances will influence what size you need, but the most common diameters are 12 and 15 inches. However, 18 and 24 inches are also available. Common lengths of the pipe are 10 and 20 feet, and they can be connected for longer culverts if needed.
Purchasing a Culvert
If your county requires you to provide the culvert, then it is time to do some shopping with their requirements in hand. Culverts are not sold at a quantity that makes them easy to find at your local big-box store, but you may be able to have one ordered. That said, you may need to get creative and look to spend your money locally. Help the local economy and save yourself the headache.
Plastic and metal culverts can be found at a local pipe supplier or your local home improvement options like Tractor Supply, Lowe’s, or Menards. Unless you have a method to get it home, make sure to arrange for delivery. You will likely have better luck arranging for delivery from a local pipe supplier than you will a big-box option.
A concrete culvert is generally sourced from pre-cast concrete suppliers locally. Your county may be able to help here, but also ask your local home improvement store. I did not have any luck finding these at a big box store, but our local hardware store is able to source them.
For our first install, we bought ours at a local pipe supplier, and we were fortunate enough to have a friend to get it to the property with a trailer. Our second install was fully done by a professional to appease the county.

Overview of Steps to Install
While I hope you have a professional doing the heavy lifting here (or at least their excavator and backhoe are doing that lifting), there are a few steps you will have to do for the install, as well.
- Find out the requirements of your county to start and get any permits required. This will likely require an application of basic information such as the property’s address and your contact information.
- Purchase and have your culvert delivered if the county requires you to provide it. Most counties will not deliver or store it for you if they require you to source the culvert yourself.
- Mark the location you’d like the culvert installed. Flags or spray paint. Some counties will provide the flags for you.
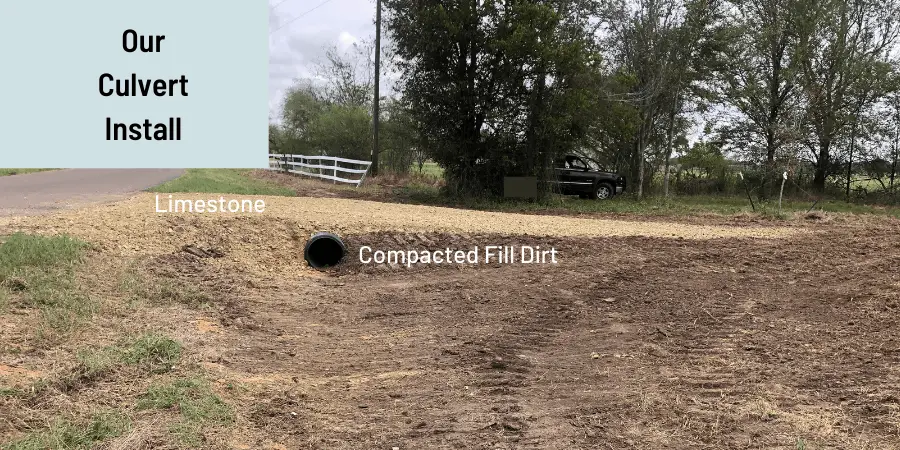
- Sit back and watch the ditch get excavated, some fill put in and then compacted.
- Keep watchincong in awe as they set the culvert and start adding and compacting dirt on top of it.
- Watch their finishing touches. Our culvert was topped with a load of limestone.
- Seed or lay down grass along any of the bare slopes around the culvert to minimize erosion and beautify it, of course.
- Sit back and admire your new bridge to your castle that crosses a mote. It’s more fun when you look at it like that.
Check out this YouTube video to see what the installers will do for their part of their culvert installations
DIY Install?
If you have the know-how to install your culvert, you can shave off all of the labor costs. Just make sure you actually know the grading requirements to make sure you don’t end up in bad shape with a washed-out culvert, and be sure to call of your local utilities to make sure there aren’t lines under the area to be excavated.
We had an accident lately that involved a knick to a gas line. It was an expensive lesson learned, but thankfully, it was not related to our culvert install.
